Obsnap Instruments Sdn Bhd
29A, Jalan SS 15/4C, 47500 Subang Jaya, Selangor, Malaysia.
Latest News
Ink Rub Tester
Oct 31, 2019
Industries that uses Ink Rub Tester.
- Printing Ink Industry
- Packaging Industry
- Chemical Industry
- Raw materials suppliers
- R&D institutes universities
Features
- 4 test modes of dry rub, wet rub, wet transfer and wet smear and 4 different test speeds to meet different test requirements
- Unique structure of single stations with arc movement structure.
Brought to you by, Victor Equipments Resources Sdn Bhd (1021443-H)
Ashing Furnaces
Oct 23, 2019
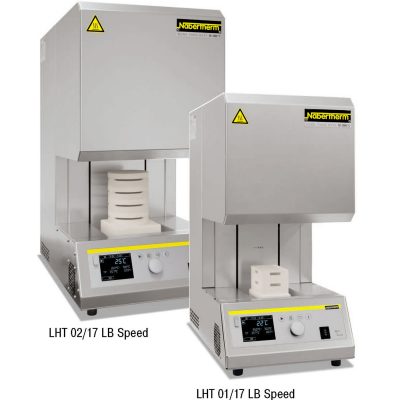
It has wide applications range through advanced materials, laboratory, dental, thermal process technology and foundry to glass and arts & craft.
WHAT IS ASHING?
Ashing in analytical chemistry is defined as the heating of a substance to leave only non-combustible ash, which is analyzed for its elemental composition.
ASHING TECHNIQUES
Dry Ashing
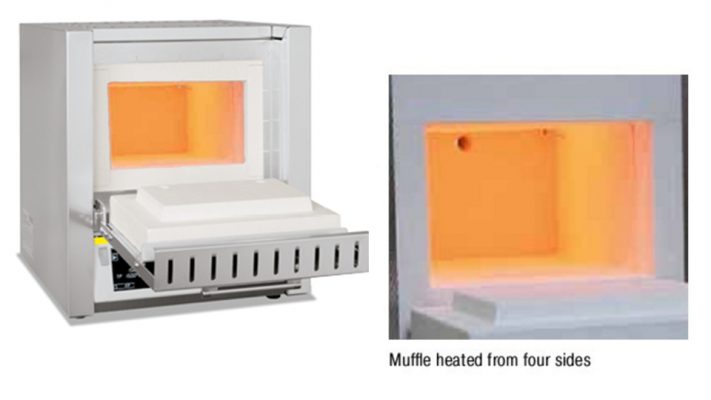
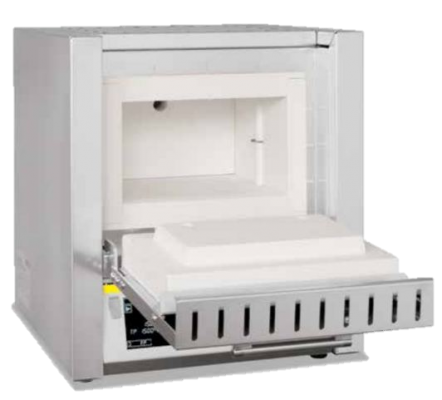
Dry ashing temperature 450°C to 550°C is usually performed by placing the sample in an open inert vessel and destroying the combustible (organic) portion of the sample by thermal decomposition using a muffle furnace.
Sulfated Ashing
Sulfated ashing involves treatment of sample after charring using an open flame with sulfuric acid and then placing in a muffle furnace.
Low-Temp Ashing
Low-temperature ashing involves treatment of the sample at ~120°C using activated oxygen.
Brought to you by, Obsnap Instruments Sdn Bhd (599642-A)
Thermal Shock: Rapid Cooling & Heating
Sep 30, 2019

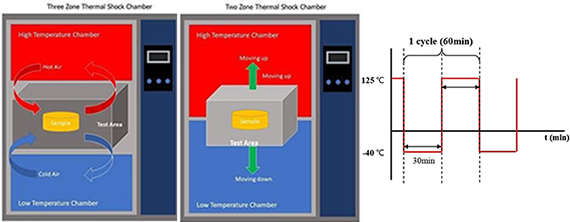
Thermal shock refers to fluctuation in temperature which causes stress in a material. Often, it results in fracture, crack, bend, etc especially to brittle materials such as ceramics.
Thermal Shock simulation test is exposing a test sample through high temperature and low temperature in a continuous cycle rapidly. And is usually applied to military products, aerospace ,automotive, packaging, or electronics to verify its ability to adapt and find out will it affect the product physically, characteristically, or it functionality
MERIDIAN Thermal Shock Simulation Test Structures
Need equipment or advice on Thermal Shock Simulation Test?
Reach out to our expert today for a professional recommendation.
Mr. Yap Hon Loon, Product Specialist, +6012 -3925901, sales13@obsnap.com
Mr. Eddie Ridzwan Lee, Product Specialist, +6012-213 5901, sales11@obsnap.com
You can browse our list of Thermal Shock
Product Weight: Falling within tolerance & saving cost
Sep 27, 2019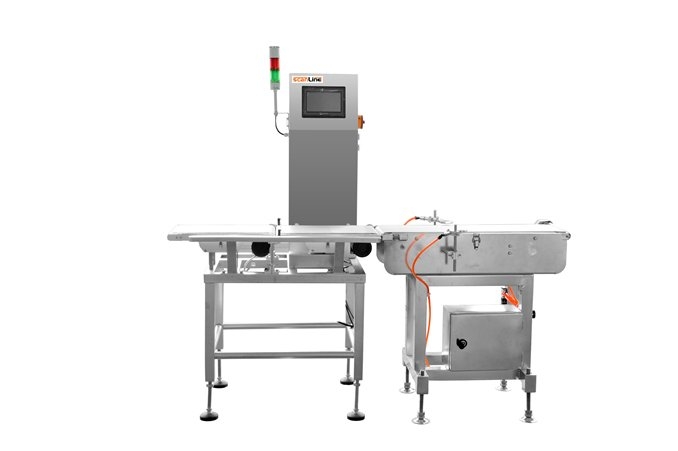
|
How to ensure product sample weight falls within tolerance all the time and achieve the benefit of savings?
One of the vital benchmarks in quality control is measuring the weight of a product. Scanline checkweigher has high-precision weight reading function to check the weight of the product throughout the process with 100% online inspection, in order to recognize any problems early.
Scanline Checkweigher scale helps to guarantee accuracy in weight to meet regulatory requirements or in-house packaging specification. It is very important for this compliance with the specified weight so that materials are not wasted and processes do not need to be repeated. The product that are out of tolerance will be rejected by automated rejection mechanism.
The 2 main Benefits of using a Scanline Checkweigher
Typical uses of checkweigher
|

Brought to you by, JS Analytical Sdn Bhd (1094207-V)
Need a Checkweigher conveyor and consistent Weight Measurement?
Reach out to our expert today for a professional recommendation.
Joe Yen, Product Specialist, +6012-6412576, joeyen@obsnap.com
You can browse our list of Checkweigher Conveyor HERE
Other Services
ISO / IEC 17025 Calibration | Repair & Maintenance | List of Metrology & Material Testing Equipment
Using the Benefits of Tensile Machines
Sep 27, 2019
“Tensile testing is a common material testing method to apply tension, load and force onto a sample until it breaks apart.”
Tensile testing has been used by quality control departments to assure that their parts & components have product integrity and safety.
Various testing methods
Destructive testing is used in order to discover a material’s mechanical and wear & tear characteristic, reaction, limits and capability. Some of the common methods are:

- Tensile Strength - measures the force or strength required to pull a sample apart i.e. until breakage / failure
- Compression - determines the specimen’s behavior and reaction under a compressive load i.e. when it is compressed, squashed, crushed or flattened
- Bending - determines the material’s ductility or resistance to fracture by deforming it into a curve surface or bend until the point of fracture
- Elongation - similar to the tensile except more focused on studying how far the material can stretch before its breaking point
- Crimp Joint Pull-off Force - pull-off test to determine the force needed to remove the wire-type samples from its joint
- Peel - measures the adhesion (stickiness) strength, especially for tape testing.
- Shear - determines strength of an adhesive i.e. glue / tape; that is applied between samples and pulled until the two samples are separated
And many more!
Collects useful data
Data collected from a tensile test, allows manufacturers to:
- Assist with the product development & design process
- Comply with international & industrial standards
- Determine batch quality & consistency
- Reduce rework material costs & minimise wastage
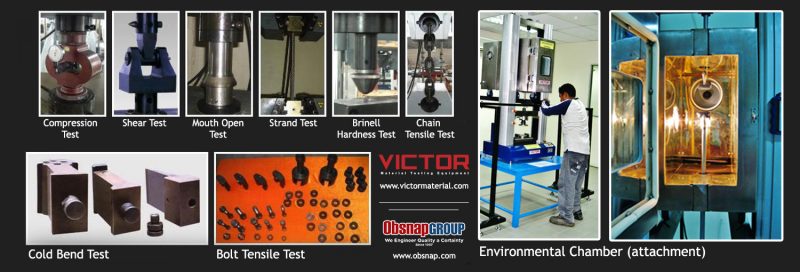
Unique Testing Accessories & Attachments
UTMs can cater to unique testing samples or meet a certain test requirement or methods for industries from metal, plastic, rubber, textile, foam, wood, etc. Thanks to its customisable accessories and grips.
Universal Industrial Application
Tensile testing specialise quality assurance of the components, materials and finished product from various industries from:
- Aerospace & Automotive
- Paper & Cardboard
- Civil Engineering & Construction
- Education & Research
- Electrical & Electronics
- Fabric & Textile
- Food & Beverage
- Packaging
- Furniture & Toys
- Medical items, devices & equipment
- Metal, Steel & Alloy
- Plastic, Rubber & Elastomers
- Production & Manufacturing
- Semiconductors
And many more!
Unsure how to choose the right Universal Testing Machine / material testing method for your application?
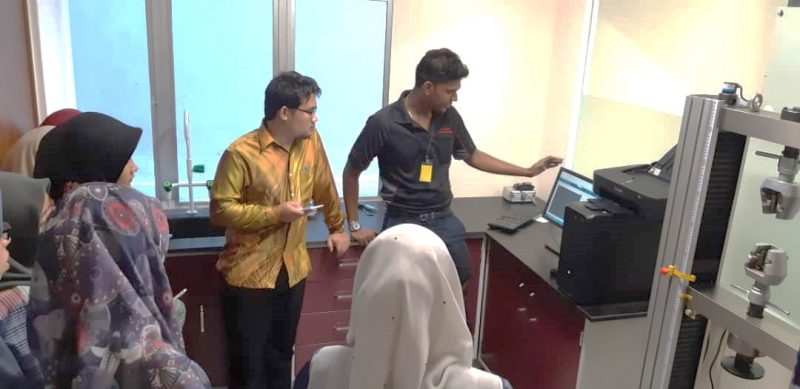
Reach out to our expert today for a professional recommendation.
Samson Chong, Product Specialist, +6012-331 2576, samsonchong@victormaterial.com;
You can browse our list of Material Testing Equipment and Serviceswww.victormaterial.com
Brought to you by, Victor Equipments Resources Sdn Bhd (1021443-H)
.jpg)
Since 2010, VICTOR have companies from:
• Automotive Industries Sdn Bhd (AISB)
• Engtex Ductile Iron Pipe Industry Sdn Bhd
• GHS Food Industries Sdn Bhd
• HELP College University Malaysia
• KYB-UMW Malaysia Sdn. Bhd.
• Shorubber R&D Institute (Malaysia) Sdn Bhd
• TÜV SÜD (Malaysia) Sdn Bhd
• UMW Toyota Motor Sdn. Bhd. and many more!

Happy Malaysia Day 2019
Sep 12, 2019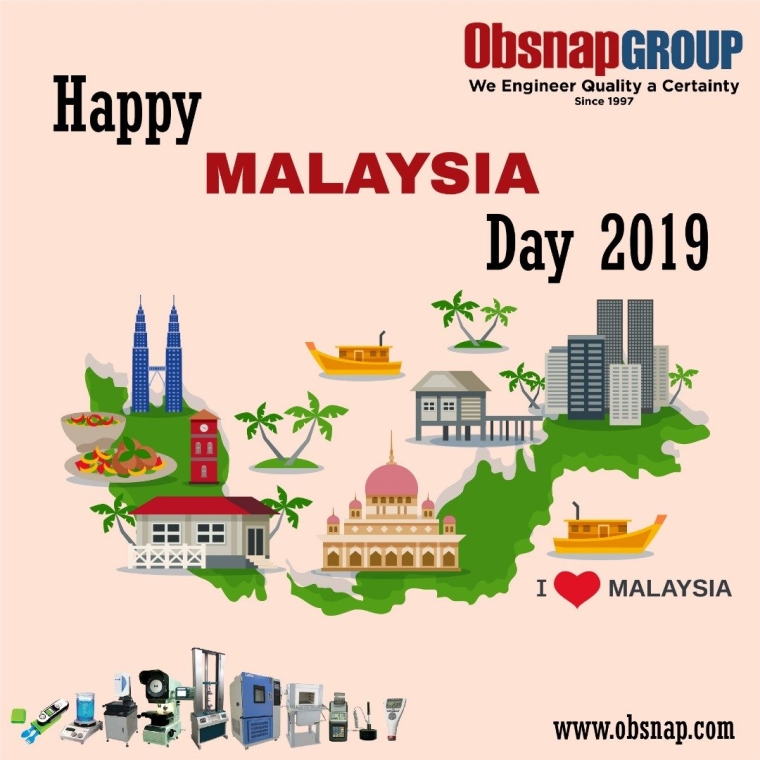
• We will be taking a break on Monday (16th September 2019)
• We will be back on Tuesday (17th September 2019)
Take care and safe travels.
High-Temperature Testing with Muffle Furnace
Aug 29, 2019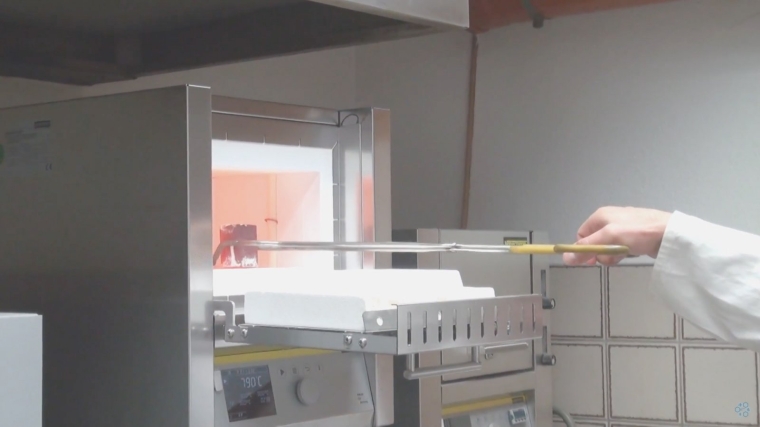
|
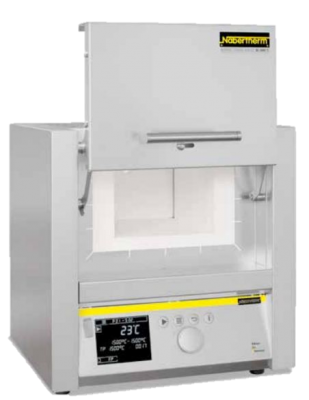
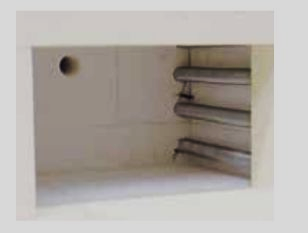
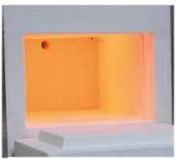
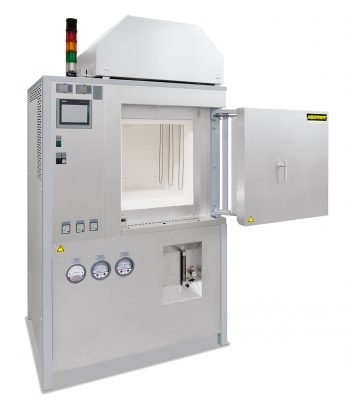
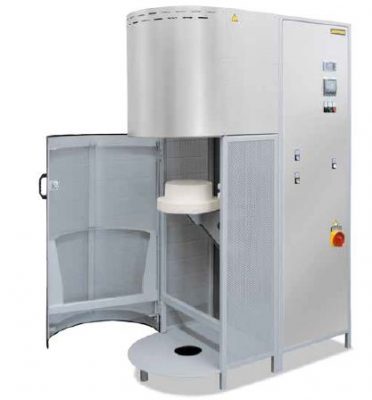
Muffle furnaces are specially designed for heat treatment (with maximum temperature between 1100°C, 1200°C or 1300°C) in a compact and convenient manner. Making it suitable for laboratories, educational institutions, research & development facilities, ceramic studios, industrial laboratories, additive manufacturing and so on. Its heating capability can be supplied by combustion fuel, by electricity (i.e. electric arc furnace) or through induction heating (i.e. induction furnace). ApplicationTempering, carburizing, annealing, hardening, and quenching, solution annealing, forging, curing, preheating, drying, ageing – are the most common applications accordingly to the requirements of the furnaces and plants. Specialty
Type of Muffle Furnace
Benefits
From the compact hardening furnace to fully-automatic plants with conveying technology and process documentation, for most heat treatment processes that are used in additive manufacturing, we will certainly find a solution tailored to your application. Other Variation of Furnaces
Need equipment or advice on Heat Treatment or Furnaces? Reach out to our expert today for a professional recommendation. Mr. Yap Hon Loon, Product Specialist, +6012 -3925901, sales13@obsnap.com Mr. Zaheem bin Hagir, Product Specialist, +6012-223 1813, sales12@obsnap.com You can browse our list of Industrial Furnaces, Other Heat Equipment, and Services |
Merdeka Day & Awal Muharram 2019
Aug 28, 2019
'Wishing you a joyous, Merdeka & Awal Muharram!'
From, Obsnap Group of Companies
NOTICE:
- We are closed on 2nd September 2019 (Monday)
- We'll be back on 3rd September 2019 (Tuesday)
Metallographic Sample Preparation (Major Steps)
Aug 26, 2019
Having trouble viewing? Visit our industry posts here.
|
“Quality control for metals & alloys are critical to ensure structure integrity and reliability for the manufacturing use and consumer application…”
Major Steps: Sectioning and Cutting
Whatever the material is, samples need to be cut accordingly to the area of interest and for handling convenience. Some of cutting methods used are: Abrasive cutting, Diamond wafer cutting, Electric discharge machining (EDM), Fracturing, Thin microtome sectioning, Sawing, Shearing, Water jet cutting, etc. Note: It is important to reduce chances of microstructure damage to avoid producing false metallographic characterization analysis later. Mounting
After cutting into a small work pieces, it will be compressed in mounting moulds with thermoplastics – acrylics, ambient castable resins or thermoplastic glues. Which:
Grinding & Polishing
Grinding helps to prepare the cut surface or mount for metallographic examination by:
After the grinding process, polishing is done to create a clearer view of the surface on the object while removing minor scratches. Etching
Metallographic etching is a chemical technique used to highlight features of metals at microscopic levels. the specimen is covered or dipped into a protective layer of etching liquid (this varies from electrochemical, chemical, physical or cathodic vacuum).
Need advice on Metallographic Sample Preparation?
Mr. Samson Chong, Product Specialist (+6012-223 2576 - WhatsApp)
Brought to you by, Victor Equipments Resources Sdn Bhd (1021443-H)
Since 2010, VICTOR have companies from:
• Automotive Industries Sdn Bhd (AISB)
View original post here
|
The Importance of Calibration Traceability
Aug 14, 2019
|
The Importance of Calibration Traceability
“A calibration performed on an instrument, can become pointless if it cannot be traced to a known reference / standard.” Most importantly, as long as there is a history to trace back to what an item’s value meant, this avoids any risk of confusion during the trace.
Proper calibration ensures that your metrological & material testing equipment are credible and traceable accordingly to its:
How to trace your measurement? Have the following:
NOTE: As long as the measuring result can be traced to a reference of documents with an ‘unbroken’ chain of calibration… This will guarantee competence in both the technical aspects of the measurements and in the quality assurance to ensure that you get a useful and valid “traceable” calibration certificate with a set of results you can rely on. For ISO 17025 Calibration / Consultation :
Ms. Sitee Nuraihah Zohari, Calibration Strategist
OTHER LINKS:
Brought to you by, Obsnap Calibration Sdn Bhd (1222585-W) which have served over 500+ companies from:
View our full list of clients HERE. |
Eid al-Adha 2019
Aug 6, 2019
From, Obsnap Group of Companies
NOTICE:
- We are closed on 12th August 2019 (Monday)
- We'll be back on 13th August 2019 (Tuesday)
SERVICES
ISO / IEC 17025 Calibration | Repair & Maintenance | Consultation | Tensile Machine Upgrade| List of Metrology & Material Testing Equipment
Brought to you by, Asia-Pacific's Total Solution Provider for Metrology, Material-Testing & Analytical Instruments


Obsnap Group of Companies has been distributing Testing & Measuring Instruments, since 1997 and has been a stable business partner with OEMs from various industries with a commitment to Quality Testing & Measuring Systems that provides Fast Measurement and Accurate Results.
Testing RoHS Compliance with XRF Analysis
Jul 31, 2019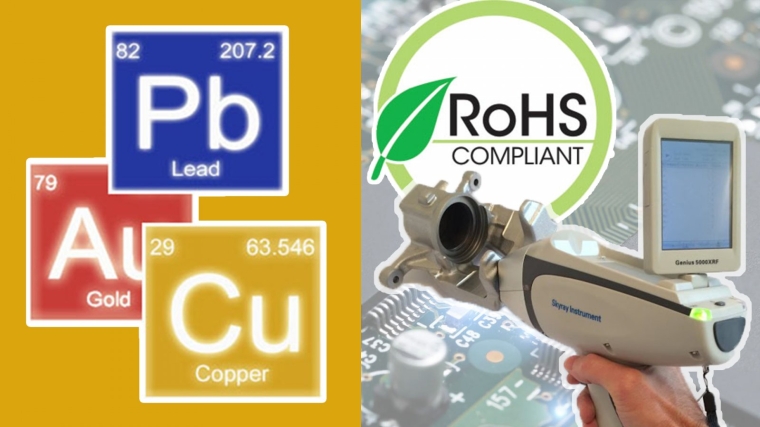
Testing RoHS Compliance with XRF Analysis“RoHS directive encourages manufacturers to reduce the use of hazardous & toxic materials to ensure user safety and product reliability while preventing future environment pollution.” Benefits of RoHS Directive & Certification Complying with the RoHS directive can encourages manufacturers to:
List of Restricted Materials
Lead (Pb) | Mercury (Hg) | Cadmium (Cd) | Hexavalent chromium (CrVI) | Polybrominated biphenyls (PBB) | Polybrominated diphenyl ethers (PBDE) | Phthalate esters (DEHP, BBP, BBP, DIBP) RoHS Compliance with XRF Testing
X-Ray Fluorescence Spectroscopy (XRF), is a non-destructive test (NDT) method that analyses the elemental composition of materials almost instantly. It is a common test method for RoHS compliance accordingly to ASTM F2617. They come in 2 platforms:
Benefits of XRF Testing
Notes: The RoHS 2002/95/EC directive can apply to the plastic, coating, electrical, electronic, energy and metal industries that deals with EEE products. Both the electronics industry and electronic consumers worldwide can benefit from this directive.
Brought to you by, JS Analytical Sdn Bhd (1094207-V) Need to scan the elemental composition of your materials? For more info, consult our product specialist
Mr. Elton Wong, Product Specialist
cc to Ms. Kan, Marketing Support |
Measure Wall Thickness without Damage
Jul 31, 2019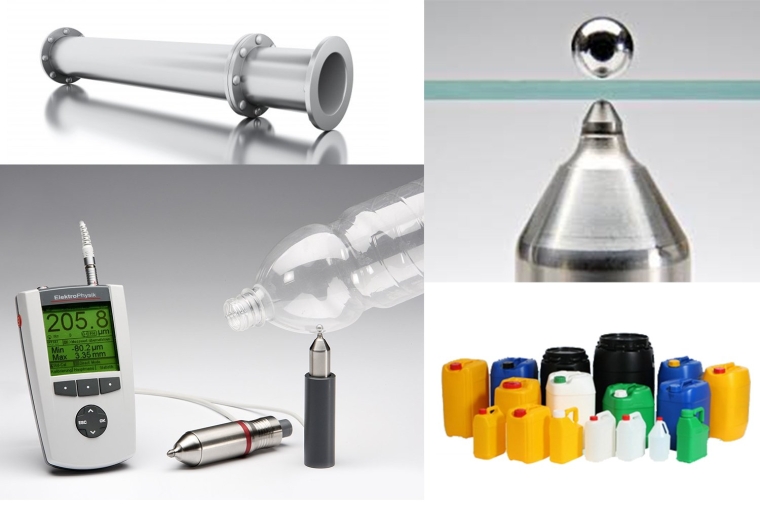
|
Measure Wall Thickness without Damage “Non-destructive measuring instruments like the wall thickness gauge and the ultrasonic thickness gauge, has helped many manufacturers to perform thickness measurement without damaging their products.” Importance of Thickness Measurement
Wall Thickness Gauge
Ultrasonic Thickness Gauge
Industry Application This measuring method can be used from manufacturers under metallurgy, ship-building (marine), machinery, chemical, aerospace, power & energy, automotive, oil & gas and many others. Note: Measuring the wall thickness of goods, can eliminate future and potential wastage while using less time to complete the quality control process. It is all in the matter of choosing which portable wall thickness gauge for your measuring needs.
Brought to you by, Obsnap Instruments Sdn Bhd (599642-A) Need Wall Thickness Testing Solutions?
Refer to Mr. Yap Hon Loon, Sales & Application Engineer :
cc to Ms. Kan, Marketing Support : |
What to Consider Before Calibrating an Instrument
Jul 23, 2019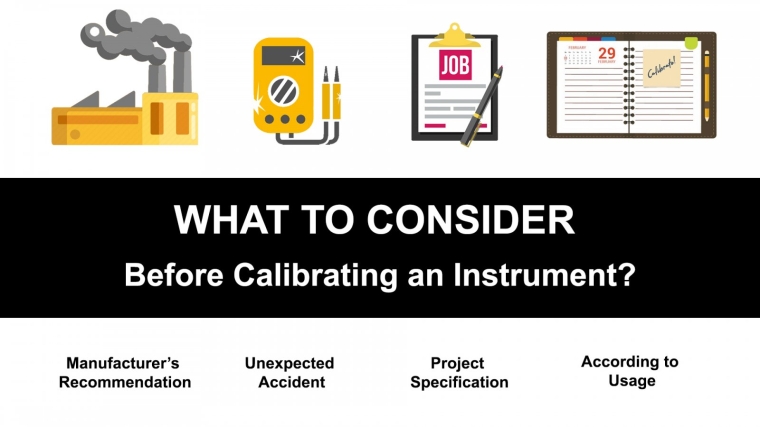
|
Before Calibrating an Instrument
Why is calibration and proper maintenance a critical process for instruments to ensure the accuracy of the measurement, reading & testing results? They will eventually produce measurement errors, uncertainty, bias (zero drft) and sensitivity drift. Thus affecting the precision, accuracy & consistency of future measurements. So, the question is: When should calibration be done to reduce and prevent measurement uncertainty?
Refer to Manufacturer's Recommendation
After an Unexpected Accident Check if the instrument’s safety integrity has been compromised, if yes or unsure, then ask the calibration or technical service team to assist on the repair, maintenance & calibration.
Accordingly to Project Requirement That includes having ISO 17025 certified instruments, using the right test equipment or having to deal with less stricter calibration standards. Regardless, always check the specifications before the test.
Frequency of Usage However, if projects are carried out less between critical and non-critical measurements, then can proceed with biannual and annual calibration is better.
NOTE: Be mindful that calibration is a form of quality assurance process that allow you to get precise and accurate results. For ISO 17025 Calibration / Consultation :
Ms. Sitee Nuraihah Zohari, Calibration Strategist
OTHER LINKS:
Brought to you by, Obsnap Calibration Sdn Bhd (1222585-W) which have served over 500+ companies from:
View our full list of clients HERE. |
Impact Resistance Analysis with Dart Impact Testing Method
Jul 15, 2019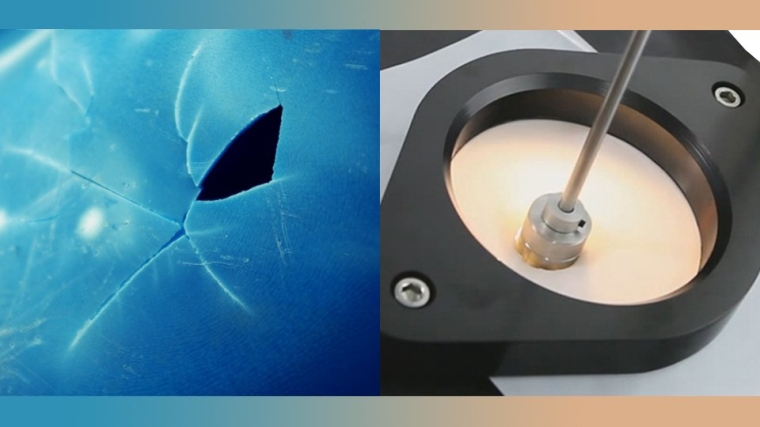
|
Analyse Impact Resistance with Dart Impact Test Method
Free-Falling Dart Impact Test is a material degradation simulation process that can evaluate the impact strength and toughness of the test sample (to do quality comparison on their end-products and raw materials). This allows manufacturers from the R&D and QC sector of laboratories, packaging, inspection, plastic film manufacturing and other related sectors, to study the impact resistance and breaking point of their products. Evaluation Process
A dart impact test utilises the falling force of the dart to simulate varied impacts by puncturing through the testing sample; this is factored by the size, shape, weight and the drop height of the dart. Benefits
ABOVE: Plastic Film Manufacturer Customer (from Port Klang, Selangor) was very happy and satisfied with our falling dart impact machine and our support.
Unsure how to perform or need advice on Dart Impact Testing? Alvin George, Product Specialist (+6012-2232593) sales11@victormaterial.com cc marketing@obsnap.com
Brought to you by, Victor Equipments Resources Sdn Bhd (1021443-H)
Since 2010, VICTOR have companies from:
• Automotive Industries Sdn Bhd (AISB)
|
Fill your Food Packages with Speed
Jun 29, 2019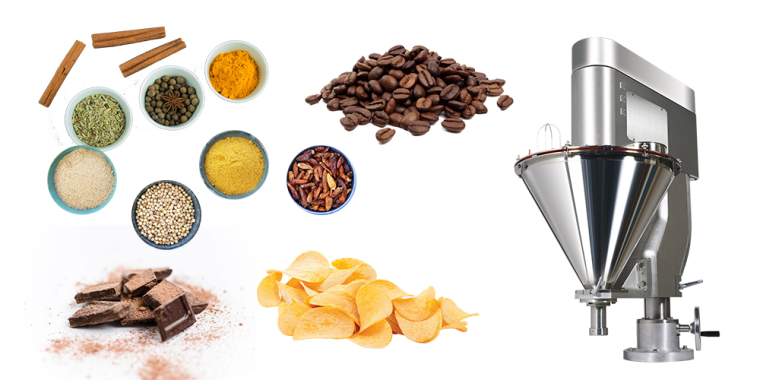
Fill your Food Packages with Speed
“Packaging has been an important part factoring the way a brand is imaged and how the products will be sold. But what are packaging for if they are not properly filled up?”
Depending on your company’s needs with filling spices, powder, beans, or other dry goods into packets, packs, bags or pouches and the like.
The most suitable filling machines are the:
An agitator or auger filling machine are specialized in handling dry powder goods filling like flour, sugar, dried beans, whole grains, talcum and many others.
Vertical Form-Fill-Seal Machine can do filling & packaging tasks in order to produce packages more quickly.
Tablet filling machines can assist with candies, pills and the sort to fill into bottles, jars, or containers by piece rather than by weight.

Depending on what you want to package, you can easily pick the machine that fits your budget, price range and specification.
Common Packaging for Dry Foods
For fast, instant and quick packaging process, those suitable are: flat bags, wide-top bags, zip bags, block-bottom bags, gusset bags, quattro packs, hem seal bags, punch-hope bags, chain bags, three-sided-seal bags, and much more.

Suitable Filling Machine Dry Foods
The packaging type stated above, manufacturers can use the Vertical Form-Fill-Seal Machine or Auger powder filling machine.

Benefits of Using Filling Machines
Each filling machine comes with various features for industries like food, pharmaceutical, chemical, oil, petroleum and many others to fit into their specific requirements to cater for :
1. Improve production rate with constant & consistent filling performance speed
2. Save production cost while reduce wastage of products
3. Reduce manual labour packaging (with automation)
4. Efficiency in production time and filling tasks
5. Upgrade-able Machinery
And many more.

Brought to you by, JS Analytical Sdn Bhd (1094207-V)
Need to pick the right filling machine?
For more info, consult our product specialist
Mr. Joe Yen, Product Specialist
joeyen@obsnap.com / 012-6412576 (WhatsApp)
cc to Ms. Kan, Marketing Support
marketing@obsnap.com / 018-2219229 (Whatsapp link)
Evaluate Coat Corrosion with Salt Spray Test
Jun 28, 2019
Evaluate Coat Corrosion with Salt Spray Test
“Can Your Coating Withstand Corrosion Attack From Short-Term & Lon-Term Deterioration Or Environmental Exposure?”
What is Salt Spray Test?
Salt spray testing is commonly used to determine the corrosion resistance of the substrate (coated material) and its surface coatings. Commonly used in marine, automotive, aircraft, metals and other industries that uses finishing & coating on metal substrates.
Benefits of Using Salt Spray Testing
Evaluation data from the test method can help manufacturers to :
- Improve the coating formula during production (i.e. durability & toughness towards corrosion attack or environmental challenges)
- Eliminate future losses of batch production, cost and rejected goods.
- Compare corrosive resistance of various metals or finishes
And many more.
How it is done?
ASTM B117 is a commonly used requirement for salt spray testing to test the corrosion resistance of metals and coated metals exposed within a standardized corrosive environment.

(1)The coated samples within the salt spray chamber, will be exposed to a salty environmental condition to simulate the corrosive effect on the samples.
(2)After the testing process, corrosion and other defective appearance will be examined on the testing material.
Suitable Coating for Salt Spray Testing
Coatings that can be evaluated with this test method are:

- Phosphated (pre-treated) surfaces (with subsequent paint/primer/lacquer/rust preventive)
- Zinc and zinc-alloy plating
- Electroplated chromium, nickel, copper, tin
- Paint Coatings
- Organic coatings such as polymeric material, paint, varnish, and rust preventives
- Metallic coverings
And many more.
Brought to you by, Obsnap Instruments Sdn Bhd (599642-A)
Need Environmental Testing Solution?

MERIDIAN specialize in supplying climatic and environmental testing chamber ton serve the Research and Development, scientific and laboratorial industries that requires QA/QC process in their production line.
MERIDIAN SALT SPRAY (CYCLIC CORROSION) TEST CHAMBER
Internal capacity: 108L, 270L, 450L, 1000L
Temperature range: RT +10 ~ 55 degree Celsius
Visit our website meridianclimatetest.com / Obsnap.com
Or
Consult & Refer to
Mr. Eddie Ridzwan Lee, Sales & Application Engineer :
sales11@obsnap.com / +012-213 5901 (Mobile Whatsapp link)
cc to Ms. Kan, Marketing Support :
emarketing@obsnap.com / +6018-221229 (Mobile Whatsapp link)
M'SIA-PLAS 2019
Jun 21, 2019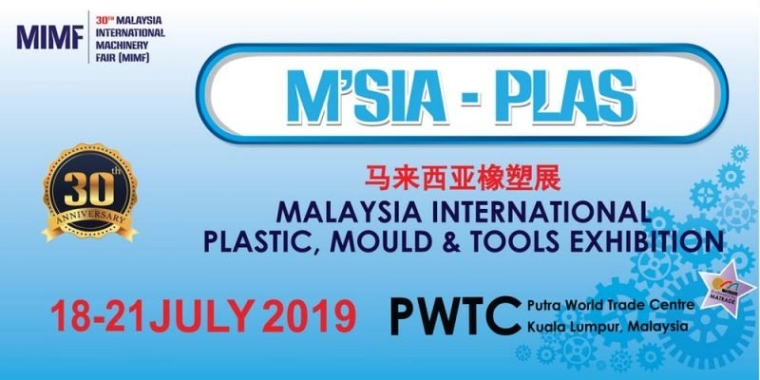
Trouble Viewing? View it HERE.
|
Invitation to M'SIA-PLAS 2019 ! Dear Sir or Madam, Obsnap Group of Companies is proud to invite you to visit the 30th MALAYSIA INTERNATIONAL PLASTIC, MOULD & TOOLS EXHIBITION. This will be our 11th exhibition together with Malayisa International Machincery Fair (MIMF). Exhibition Details: Since 1998, the MALAYSIA INTERNATIONAL PLASTIC, MOULD & TOOLS EXHIBITION (M’SIA-PLAS 2019) is proudly presented by ES Event Management Sdn Bhd to industry players for the 30th time. Being endorsed by Malaysia External Trade Development Corporation (MATRADE), the event is expected to attract more than 10,000 local and international trade visitors and industry players.
Benefits of Visiting:
If you have any inquiries on this exhibition, email to marketing@obsnap.com |
SEMICON West 2019
Jun 21, 2019
|
Invitation to SEMICON West 2019 !
Dear Sir or Madam,
It is an honour for us to invite you to visit the our 1st exhibition together with SEMICON West 2019. WHERE TO FIND US?
WHY JOIN SEMICON: SEMICON West attracts a highly influential audience of business and technology leaders, executives, researches , and industry analyst from across of microelectronic supply chain. Job function Engineer | Design | Chemicals/Materials | Equipment | Fabrication & Process | Test | Packaging/Assembly | QA | Manufacturing/Operation | Field Service | Facilities | Executive Management | Research and Development | Purchasing and Procurement | Government and Public Policies | Business Development Areas of Interest SEMICON West visitors interested in wide range of industries, technologies, and product from across the supply chain, from design to manufacturing. Semiconductor | MEMS/Sensor | Flexible Hybrids Electronic, Printed electronics | LED/ solid state lighting | Photonics | Display | Photo-voltaic/Solar | SoftwareAapplication | Consumer Electronics | Iot | Automotive Electronics | Medical Electronics/ MedTech
If you have any inquiries on this exhibition, email to Mr Syafiq at sales@victortestingmachine.com We look forward to your visit! |




.jpg)
.jpg)


.jpg)


